Showing posts with label DIY. Show all posts

Thursday, February 12, 2009

DIY Wedding Video Seminar Part 2


We are so excited to welcome back Jewel of Savadelis Films for Part 2 of DIY Wedding Video
Make sure you sign up for the DIY Wedding Video Seminar as this is sure to be something you will not want to MISS! Click Here

Part II: Five Tips to Avoid Missing the Most Important Moments at a Wedding

TIP 1: The bride and groom and camera-people should have an honest conversation about what the couple expect and what effort the cameraman is willing to commit. Determine if there is an agreement of what needs to be done well in advance of the wedding day.

TIP 2: The cameraman should get a schedule from the bride or event coordinator. Get to the activity ahead of schedule so you can set up and be in a good position before things get started.

TIP 3: The cameraman should ask the bride and groom to keep you posted if something impromptu is going to occur.

TIP 4: Keep an extra memory card or tape and camera battery with you at all times

TIP 5: During periods of the day when there are no formally scheduled activities, look around. Adorable young children will often provide great moments as will one or two tables of rowdier friends and the infamous ‘cousins’. Or maybe you’ll just catch the bride and groom in an unguarded moment admiring their rings or brushing a lock of hair from the other’s face. It might just turn out to be the best shot of the day.

Thank you so much Jewel! Stay Tuned next week for Part 3.

Thursday, February 5, 2009

DIY Wedding Video Seminar Part 1


Greetings! Today we are so excited to have Jewel Savadelis from Savadelis Films here with the first of a 3-part series on How TO DIY Your Wedding Video. We find the #1 regret among brides after the wedding is that they didn’t get a good video. Here’s a way you can avoid that regret.

Jewel and her husband Chuck are among the best videographers in the country. Based on six years’ experience producing great wedding movies, they have put together the most important tips for getting a better wedding video, just for our readers.

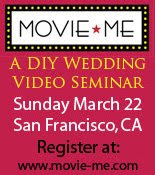
To Bay Area couples – Chuck and Jewel are offering a seminar on How to Make a Wedding Movie Everyone Will Love on Sunday, March 22 in San Francisco. Click here  for more information and to register. If you leave a comment at the end of this post by February 14 with your name and email address you will be entered into a drawing to win TWO FREE TICKETS to the seminar! In addition anyone can enter the drawing to win a FREE FLIP VIDEO CAMERA ¬here

Part I: Ten Tips to Instantly Shoot Better Video

The four reasons you DON’T want your buddies to shoot your wedding video are: poor images, poor sound, they missed something important, and the video is B-O-R-I-N-G. Here are some tips to fix the first two problems. Part II will address the last two problems.

TIP 1: Stop the wild camera movements!
If your subject is worth seeing, it’s worth seeing well. The hallmark of a novice videographer is that they jump from one thing to the next, not holding any shot long enough for anyone to see what’s going on. And, please, stop the zooming! The constant in-out-in-out movement is distracting from what your viewers want to see – a beautiful couple getting married and friends and family having a good time.

TIP 2: Take the jitter out
Once you’ve settled down (see Tip #1), learn how to hold your camera so you can take out those small movements that make viewers feel seasick. Here’s how:
a. Bring your elbows into your sides and hug the camera close to you; don’t hold it out in front of you where it is unsupported.
b. Lean up against a wall for support.
c. Go down on one knee and lean your camera elbow on your knee to steady the camera.
d. The wider the shot, the less noticeable the shake.
e. Put the camera on a tripod for the steadiest of all shots.

TIP 3: Hold each shot for at least 10-15 seconds
You can always make a 10-second shot a 2-second shot.

TIP 4: Shoot more than you think you need.

TIP 5: Frame your shots well
Obey the “rule of thirds” Imagine a tic-tac-toe board over your viewfinder. The lines intersect in four places. Frame the action at one of these four spots, off-center not squarely in the center. Oh, and don’t “bull’s eye” your shot. That is, if you draw a horizontal line that bisects the screen so 50% is above and 50% below it, do NOT frame the shot so a person’s eyes are on that line. Frame the shot so a person’s eyes are on the top line (66% line) of that tic-tac-toe board. This is one of those things you have to experiment with and then you get the “ah ha” moment. See what I mean?

TIP 6: Shoot from many angles
For static shots like the ceremony and toasts, the best place for the camera is on a tripod. But for the unscheduled activities like the cocktail party and open dancing, take that camera off the tripod and shoot from creative angles!

TIP 7: Get good sound
Even a cheap mic close-up will get better sound than an expensive mic far away. If what you’re recording is important enough (like your vows), rent a professional grade wireless mic for about $40 to get much, much better sound than you get from the built-in camera mic. Oh, and check to make sure the sound is on, that you can hear it through your headphones. And make sure YOU are not talking while the sound is recording! Video accompanied by ambient sound is much more interesting (glasses clinking, people cheering, children laughing).

TIP 8: Know your camera well
Learn how to use the manual focus and manual exposure on your camera. Your shots will improve greatly.

TIP 9: Turn off the special effects
Please! If your camera has special effects like sepia, B&W, autofade or dissolves – turn them off. Nothing looks quite as dated and cheesy as those effects. There’s plenty of drama going on at the wedding. Focus on that.

TIP 10: Have fun!
Shooting video is a lot like dancing. Once you have the basic steps, it becomes natural and then you can really really have fun. The more you practice, the better you’ll become.

Greetings! Today we welcome back Jewel Savadelis from Savadelis Films (www.savadelis.com) with the second of a 2-part series on How TO DIY Your Wedding Video. We find the #1 regret among brides after the wedding is that they didn’t get a good video. Here’s a way you can avoid that regret.

Jewel and her husband Chuck are among the best videographers in the country. Based on six years’ experience producing great wedding movies, they have put together the most important tips for getting a better wedding video, exclusively for our readers.

To Bay Area couples – Chuck and Jewel are offering a seminar on How to Make a Wedding Movie Everyone Will Love on Sunday, March 22 in San Francisco. Click here (www.movie-me.com) for more information and to register. If you leave a comment at the end of this post by February 14 with your name and email address you will be entered into a drawing to win TWO FREE TICKETS to the seminar! In addition anyone can enter a drawing to win a FREE FLIP VIDEO CAMERA ¬here (www.movie-me.com/register.html)

Thursday, December 11, 2008

DIY Thursday- Guest Blogger Annette from Swany Tables

Greetings today we are so excited to have Annette from Swanky Tables here and she has some fabulous ideas and tips for your Holiday Wedding or Event....We hope you enjoy the post! She has so many great ideas and you can do them your self another great DIY!!!


I'm thrilled to share this DIY festive holiday table with you today.
With a color palette of red, white, and black, this modern design is
perfect for a winter wedding or event. Grab some red food coloring
and some fun vases and let's get started:


The Centerpiece:
I filled these longneck vases from CB2 , {on sale for $3.95}, with a couple inches of water, then add some red food coloring.
Fill the vases with the remaining water until you are about 3 inches
from the top. Add your flower of choice. I used white peonies
because they are my favorite flower, but I also think a tall spray of
flowers would look amazing. I added red square acrylic votives
for candlelight.

Escort Cards or Place card Holders:

I love these Snow Flurry card holders
to place your escort cards in. They give you a holiday feel without
screaming "Christmas". Instead of creating rows of cards on a table
you could also hang them with ribbon on a small tree or branch with
each guest's name.

Place Setting + Favor:

The place setting begins with a white square plate, white napkin, and
a black toile with red accent "menu card" . Even though this is
actually a Save the Date card, the toile pattern really softens the modern decor. The favor is a
candy filled red amac box with white pom-pom wired ribbon. I also added a small card, that you could customize with a date, name or special saying.

Additional decor details:

Branches are very popular and make an amazing centerpiece or table
display for a winter wedding. I love adding hanging votives and
crystals to Manzanita or Mitsumata branches. A good site to check out
is Nettleton Hollow(www.nettletonhollow.com) for supplies and
inspiration.

Thank you Savvy Event for letting me share my holiday table. Hope
everyone have a wonderful holiday season!

Thank you Annette....we look forward to more great ideas from you!!! Also make sure you check out her blog!!!

Thursday, November 20, 2008

DIY Thursday Welcomes:


I'm thrilled to share my Save the Date cards with you. They're fairly simple to create
 if you have all the right tools. I've listed some of my favorite tools for the job:
2 pieces of Circle Cardstock
Square envelopes
1 inch photo
1 brad
White Glue
Ink Pad
Rubber Stamp
Exacto Knife
Paper Awl

Use a rubber stamps to personalize one of the paper circles. You can use stamps like the orchid and the save the date. The orchid rubber stamps are great because they match the rest of the Tamarindo wedding stationery, and then the stamp can be used for favors, guest bags, etc. After your decorating is done, cut out a square window (or use a square scrapbooking punch for the job). I also used a round punch to take a small bite out, so it would be easier to spin the back circle.

With the paper awl, punch through both circles and insert your brad. Using your cut out window as a guide, lightly pencil in where you'll add your picture and text. Undo the brad and set aside the top circle. Add your message in parts. Mine said “Melissa and Chad”… “are getting married”… “June 8th”… “Camarillo, CA” and glue in your picture. Reattach the pieces and you have it! A very fun save the date card.
For a bit of extra charm, you can also stamp


Thank you so much to Melissa for guest blogging with us today! She is very talented and her invitations are simply fabulous! We hope to hear more DIY from her in the future!! Please check out her website as she is truly amazing! Also check out her blog too!!!
Thank you Melissa!!!

Thursday, November 13, 2008

DIY Thursday


DIY POM POMS
The Barn at Cornerstone Gardens in Sonoma, California
A Walnut Orchard in Winters, California

Photos from Martha Stewart

Pom Poms can add a little touch to any wedding or event. The above weddings took place in two different places but both brides chose to add a little flare to their wedding with the DIY Pom Poms. We found the how to at Martha Stewart to share with all of our readers! If you have made these before leave us a comment or send us a photo at ido@asavvyevent.com

How to Make the Pom-Poms-From MarthaStewart.com

You'll need tissue paper and 24-gauge white cloth-covered floral wire.

Hanging Pom-Poms
1. Stack eight 20-by-30-inch sheets of tissue. Make 1 1/2-inch wide accordion folds, creasing with each fold.

2. Fold an 18-inch piece of floral wire in half, and slip over center of folded tissue; twist. With scissors, trim ends of tissue into rounded or pointy shapes.

3. Separate layers, pulling away from center one at a time.

4. Tie a length of mono filament to floral wire for hanging.


Have fun DIYing...

aSe
A Savvy Event

Thursday, November 6, 2008

DIY Thursday


Thursday is DIY day at A Savvy Event 
and today we are featuring a new blog!


We are excited to announce a new DIY Invitations website for brides looking to create their wedding invitations on their own. CardgirlDIY is a terrific resource site created by Cardgirl Invitations to assist the large numbers to brides interested in creating their own wedding stationery. There was no "one" place to go to find practical information about where to buy paper, what size the cards should be or how to best print them. Although it was started with brides in mind, Cardgirl DIY has turned into an everyone site. It's even a good quick reference for those with their own invitation or printing business! 
In celebration of CardgirlDIY & a general love of letterpress, Cardgirl Invitations is offering 10% off all letterpress orders placed before the end of November. This includes holiday cards, birth announcements, stationery & wedding invitations. Nessa is truly a leader in the letterpress stationery world, and we look forward to reading more of her tips and ideas for creating fabulous invitations!


So if you are a bride that likes to be "crafty" and put your "personal" touch on things please head on over to Cardgirl DIY Blog


Please Stay Tuned as we will have some fabulous tips from Nessa on DIY projects coming up in the coming weeks!!!


~aSe~ 
a Savvy event...